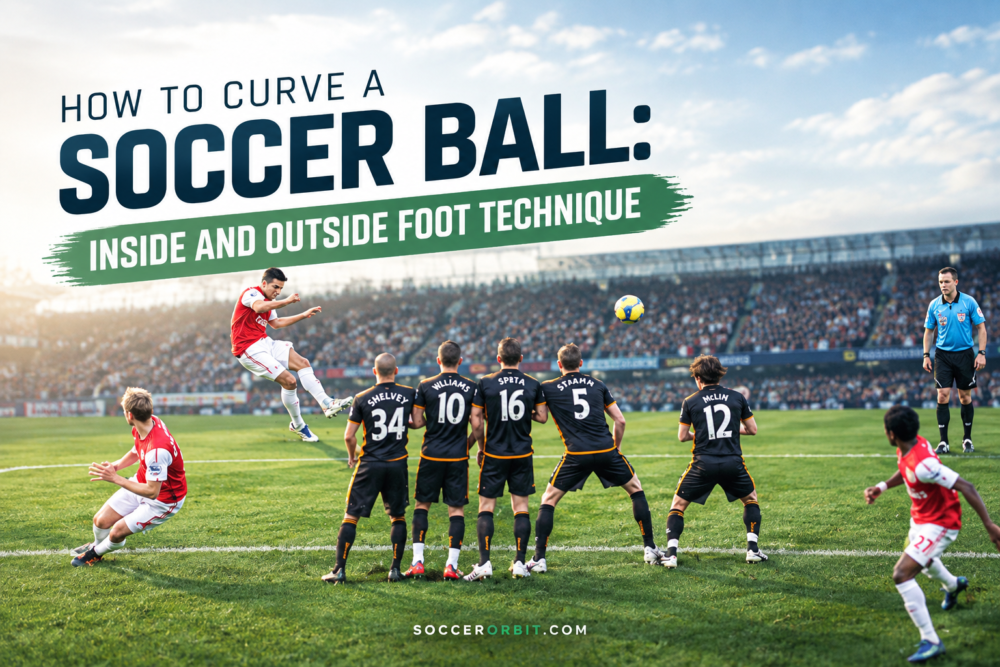
A football can travel in a perfectly straight line for the first few metres, then suddenly start drifting toward a corner that looked safely out of reach. For the goalkeeper, that little change of direction can turn an ordinary shot into a rather unpleasant evening.
That familiar bend comes from a deceptively simple combination of contact, spin, foot position and timing. The player does not need to swing the leg around the ball like they are stirring a pot of tea, either. The foot simply has to catch the right part of the ball, with the right surface, while moving in the right direction.
That is the basic idea behind how to curve a soccer ball, whether the aim is an inside-foot free kick curling around a wall or an outside-foot trivela that takes the scenic route toward its target.
The beauty of the technique is that the ball does most of the explaining once the contact is right. The foot creates the spin, the air reacts to it, and suddenly a goalkeeper is moving one way while the ball has developed other plans.
What Makes A Soccer Ball Curve?
When the foot strikes the ball away from its centre, friction and deformation during impact help create rotation.
Research into curve kicking found that the distance between the foot’s contact point and the ball’s centre has a strong influence on the amount of spin produced, with greater offset generally creating more rotation, although there is a trade-off between spin and ball speed.
So there are three things to think about:
Where you strike the ball.
Which part of the foot strikes it.
The direction your foot travels through contact.
Understanding how these elements work together can also help players develop a more consistent striking technique, particularly when they are trying to generate both power and accuracy rather than relying on force alone.
The ball then takes care of the physics.
For the conventional inside-foot curl, the player generally strikes across the ball using the inside of the foot, producing sidespin that bends the ball away from the initial line.
For an outside-foot curve, commonly associated with the trivela kick technique in soccer, the outside of the foot creates the opposite spin and therefore the opposite direction of bend.
A biomechanical review describes the trivela as essentially the opposite contact-side technique to the conventional curl, with the outer three toes commonly involved in the strike.
READ ALSO | How to Strike a Soccer Ball with Power & Accuracy: Step-by-Step Biomechanics
Inside-foot curl: The Technique Most Players Must Learn First
The inside-foot curl is the more natural starting point because it provides a relatively large contact surface and gives players better control while they learn to manipulate spin.
Imagine a right-footed player standing outside the right edge of the penalty area and trying to bend the ball toward the far corner.
The target is left.
The ball initially travels somewhat right of that target, then curls back left.
That is the basic picture.
Step 1: Approach from an angle
Do not walk directly toward the ball and expect the foot to magically wrap around it.
Take a slightly wider approach, allowing the final swing to travel across the ball. Research on elite footballers performing curved free kicks found that a wider approach angle was associated with the movement pattern needed to produce a curved trajectory.
Your approach should feel relaxed rather than frantic, because excessive speed can make the final contact harder to control.
For a right-footed player, approaching from the left side of the ball can create a useful angle for an inside-foot curl toward the left, while the exact approach should be adjusted according to the target and desired curve.
Step 2: Place the support foot beside the ball
Your non-kicking foot provides the platform from which the rest of the movement happens.
Place it beside the ball, roughly alongside its middle, with the knee slightly bent and the body balanced over the support leg.
For a curved shot, the support foot does not necessarily point directly at the final target in the same way it would for a straight instep strike. Research into elite curve kicking found that, for right-footed players in the studied setup, the support foot was positioned toward the right of the intended target.
That helps create room for the kicking leg to travel across the ball.
Step 3: Open the hips and prepare the swing
As the kicking leg moves back, allow the hip and knee to prepare for a sweeping movement rather than a straight-line smash.
This matters because soccer kicking is a coordinated sequence involving the pelvis, thigh, lower leg and foot, with angular velocity passing through the segments toward the ball.
A common mistake is trying to manufacture the curve entirely with the foot.
The foot matters enormously, yet it arrives at the ball because the rest of the leg has put it there.
Step 4: Strike the side of the ball
For an inside-foot curl, aim to contact the ball off-centre, rather than through its middle.
If you are right-footed and want the ball to curl left, contact the ball toward its right-hand side from your perspective, allowing the foot to brush across it toward the left.
Do not think about slicing underneath the ball.
Think about around and across.
The more dramatically off-centre the contact, the more spin you can potentially generate, although too much offset can sacrifice forward speed. Research on curve-kick impact confirms this trade-off between ball speed and spin.
Step 5: Wrap the foot around the ball
This is the part young players often describe as “swiping” the ball.
Your foot should move across the ball rather than stopping immediately after contact.
Elite curve-kick research found that curved kicks involved the kicking limb swinging across the face of the goal, with the foot moving upward and outward at impact.
The important word here is through.
Do not deliberately try to make a theatrical circular motion around the ball, because that often produces a weak, sliced contact.
The curve comes from the combination of contact point, foot orientation and swing path.
Step 6: Let the ball fly before judging the technique
A good curl often looks wrong for the first few metres.
The ball can initially travel away from the eventual target before the spin bends its trajectory back toward it. Studies of elite curved kicks found greater lateral launch angles and greater sidespin compared with conventional instep kicks.
This is why a player should not judge a curved strike solely from the first part of its flight.
Watch the entire path.
If the ball starts correctly but does not bend enough, the player probably needs more effective sidespin. If it bends beautifully but dies before reaching the target, too much energy may have been devoted to spin rather than forward velocity.
That balance takes practice.
READ ALSO | How to Practice Soccer Alone Without Any Equipment (No Cones Required)
How To Curve The Ball With The Outside Of The Foot
The outside-foot curve is where things become particularly interesting.
The trivela kick technique in soccer, famously associated with players such as Ricardo Quaresma, uses the outside of the foot to create a different spin direction from the conventional inside-foot curl.
It can be useful when the body position makes an inside-foot strike awkward, when a player wants the ball to bend away from the expected line or when there is a passing or shooting angle that simply looks better from outside the foot.
It is also harder.
A review of soccer scoring techniques notes that the trivela has received far less biomechanical research than conventional curl kicking and is generally more difficult because of the altered swing and smaller contact area.
Step 1: Approach naturally
Do not completely rebuild your running technique for the outside-foot strike.
Approach the ball at a comfortable angle that gives the kicking leg room to travel through the outside surface of the foot.
The objective is to arrive balanced enough that you can control the contact rather than merely hoping the ball catches the shoe correctly.
Step 2: Keep the ankle firm
The outside-foot strike needs a stable foot.
Letting the ankle collapse at contact makes the strike unpredictable, especially because the usable contact surface is smaller than the inside of the foot.
Think firm ankle, relaxed leg and clean contact.
That combination is far more useful than trying to force maximum power.
Step 3: Strike with the outside of the foot
For the classic trivela, the outer part of the foot, often around the three smallest toes and adjacent outside surface, makes contact with the ball
The contact should be off-centre enough to create spin while still giving the ball sufficient forward momentum.
This is where beginners often make the mistake of trying to hit the ball as far outside its centre as possible.
More spin is not automatically better.
You are trying to bend a ball toward a destination, not win a scientific argument about rotation.
Step 4: Swing through the ball
The outside-foot technique needs a clear follow-through because the direction of the foot at impact helps determine the ball’s initial path and spin.
Keep the movement flowing rather than snapping the foot away immediately after contact.
A good trivela should feel like a natural continuation of the kicking action rather than a desperate attempt to reach the ball with the wrong side of the shoe.
Inside Curl vs Outside-foot Curve
| Technique | Contact area | Main effect | Difficulty |
|---|---|---|---|
| Inside-foot curl | Inside of foot | Controlled sidespin and bend | Moderate |
| Outside-foot trivela | Outside of foot | Opposite spin and bend | Advanced |
| Straight instep | Laces/instep | Speed with limited sidespin | Basic to advanced |
| Chip | Lower portion of ball | Height and lift | Advanced |
The biggest difference is not simply which part of the shoe touches the ball.
The contact point on the ball, foot orientation, approach angle and swing direction all work together to determine what happens next. Recent biomechanical research has also shown that foot contact point and instep orientation can strongly predict the ball’s lateral launch direction.
READ ALSO | 10 Wall-Ball Drills to Dramatically Improve First Touch and Passing Accuracy
20-minute Curve-ball Training Session
Young players often try 30 spectacular free kicks and learn very little because every repetition changes.
Give the session some structure.
Five minutes: stationary spin
Place the ball 5 to 7 metres from a target.
Use the inside of the foot and concentrate on producing obvious sidespin with moderate pace.
Do not worry about scoring.
Five minutes: controlled curl
Move to around 10 metres and aim around a cone or mannequin rather than directly at goal.
Start the ball outside the target and attempt to bring it back toward the target through the spin.
Five minutes: moving approach
Take two or three steps before striking.
This introduces the approach angle and support-foot placement that become important in real match situations.
Five minutes: free kicks
Move farther away and introduce a wall or passive defender.
Now the player has to balance three things:
Height.
Curve.
Speed.
If the ball curls beautifully but never reaches the goal, add speed. If it reaches the goal but flies straight, improve the contact. If it spins wildly and finishes nowhere near the target, reduce the amount of force and return to cleaner technique.
Why Some Players Struggle To Bend The Ball
The usual problem is not a mysterious lack of talent.
It is contact. The same attention to the quality of contact matters when receiving the ball, where a softer touch can keep the ball closer and give the player more time for the next action.
Players often strike too close to the centre of the ball, swing too directly toward the target or approach without giving the kicking leg enough room to travel across the ball.
Another common problem is trying to create spin with the foot while forgetting the rest of the movement.
Soccer kicking is a whole-body sequence, and research shows that changes in approach angle alter the movement of the support leg, kicking leg and upper body.
There is also a useful developmental point for coaches and parents: younger players naturally produce different kicking speeds and movement patterns as strength, coordination and neuromuscular control develop. Research comparing players aged 12 to 17 found increases in ball velocity alongside changes in leg strength, muscle activation and kicking mechanics.
So a 12-year-old should not be expected to reproduce the curve of a physically mature professional simply because somebody showed them a slow-motion video.
Technique can be taught.
The physics still has to negotiate with the body.
READ ALSO | How College Soccer Recruiting Works: A Year-by-Year Roadmap
Best Way To Remember The Technique
For the inside-foot curl, remember:
Approach wide → plant beside the ball → open the body → strike off-centre → sweep across → follow through.
For the outside-foot trivela, think:
Approach naturally → stable ankle → contact with the outer foot → strike off-centre → follow through in the direction of the curve.
And when someone asks, “How do you bend a soccer ball like a professional?”, the answer is less glamorous than the finished shot suggests.
You create spin by controlling the contact.
You create direction by controlling the foot.
You create a useful curve by combining both with the right approach and enough forward speed.
The ball may appear to change its mind halfway to goal, yet it has followed the instructions your foot gave it several milliseconds earlier.