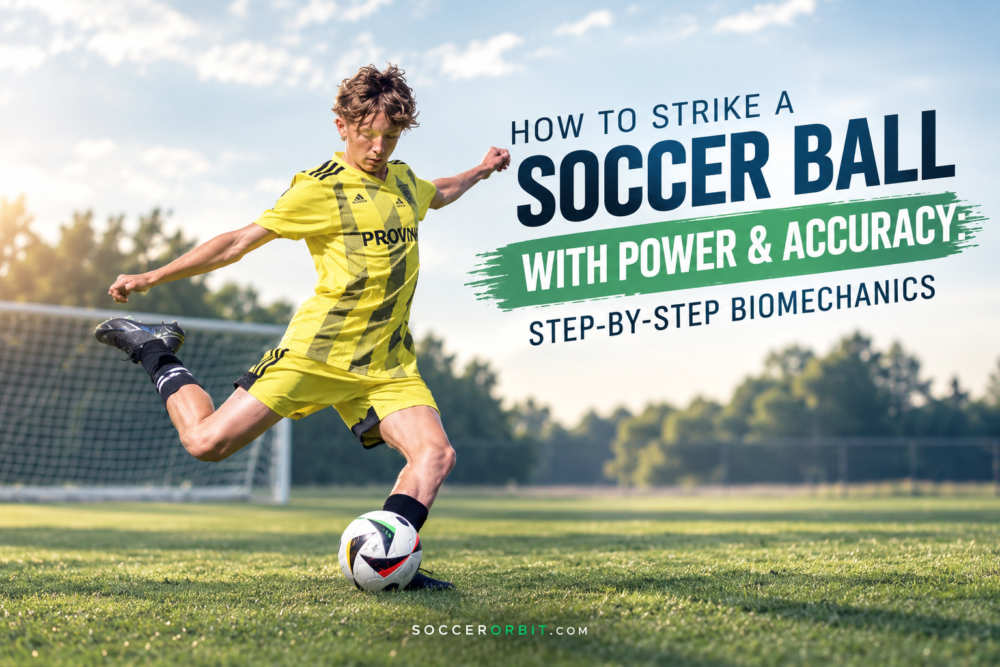
Learning how to strike a soccer ball with power has surprisingly little to do with simply swinging the leg harder. A young player can throw everything into a shot and still produce a ball that floats harmlessly over the crossbar, while another player with a smaller build can generate a fierce, driven strike because the movement is better organized from the ground up.
The difference comes from sequencing.
A powerful soccer shot begins with the approach, continues through the plant foot, travels through the hips and thigh, accelerates through the knee and finishes with a firm foot meeting the ball cleanly.
Research into instep kicking consistently describes this as a proximal-to-distal movement, with angular velocity building from the thigh to the lower leg and finally the foot.
For youth players, that is useful news. You do not need adult-sized muscles to learn adult-quality technique.
Where Do You Strike The Ball To Kick It Hard?
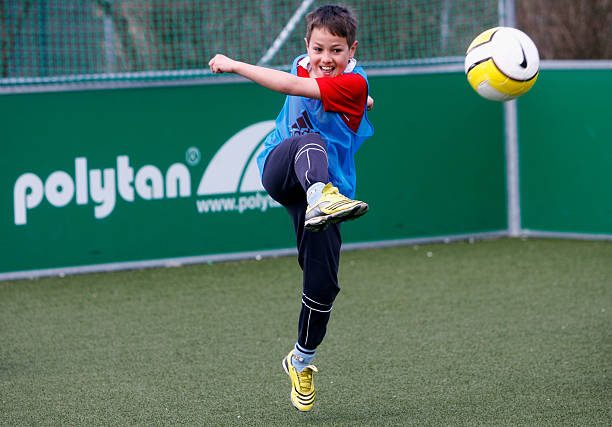
For a conventional power shot, strike the middle of the ball with the laces or upper instep, with the ankle firm and the toes pointing down.
That combination gives the foot a solid striking surface and helps transfer the speed of the lower leg into the ball rather than allowing the foot to collapse at contact.
England Football also identifies the laces as the basic technique for producing power, while the inside of the foot is generally better suited to controlled placement.
Think of three simple relationships:
Laces + centre of ball = driven power
Inside of foot + controlled contact = placement
Under the ball + upward contact = lift
Players who want to build these basic ball skills at home can also use a short, structured routine to improve their touch, control and comfort on the ball before adding more advanced finishing work.
If a player repeatedly gets underneath the ball while leaning backwards, the problem usually has little to do with leg strength. The body position and contact point are sending the ball upward before strength has much chance to help.
Step 1: Approach the ball with purpose
Do not sprint at the ball as though it owes you money.
A short, controlled approach gives the player time to organise the final steps and place the support foot accurately. Research shows that approach angle can influence kicking mechanics and ball velocity, although there is no single magic angle that every player needs to copy.
For a basic instep drive, approach from a slight angle rather than running directly behind the ball.
As the final step arrives, the player should already know where the ball is going, because the last stride is about positioning the body rather than generating theatrical amounts of momentum.
Step 2: Get the plant foot right
This is where many young players lose power before the kicking leg has even started its main work.
Plant the non-kicking foot beside the ball, with the foot generally pointing toward the intended target and the knee slightly flexed. Research specifically examining support-foot placement found better ball speed and accuracy when the support foot was next to or slightly ahead of the ball’s centre, without excessive side-to-side separation.
The study found an effective side-to-side distance in the region of 27 to 37 cm, although children should not be expected to measure this with a ruler every time they shoot.
The coaching cue is simpler:
Plant beside the ball, stay balanced, and let your body move through the strike.
If the plant foot lands too far behind the ball, the chest tends to open backwards and the player often gets underneath the ball. If it lands excessively far away, balance and contact become harder to control.
Step 3: Load the kicking leg
As the plant foot hits the ground, the kicking leg should move backwards with the knee bent.
This backswing stores movement that can then be converted into forward speed. The important part is what happens next: the thigh begins moving forward before the lower leg rapidly extends.
That sequence is the heart of the biomechanics.
Researchers studying powerful instep kicks have found that foot velocity, knee-relative velocity and thigh angular velocity are strongly associated with ball velocity, while other research involving academy-level players identified knee-extension velocity at ball contact as a particularly important predictor of ball speed.
So when coaching a child, avoid saying, “Swing your leg harder.”
A better instruction is:
“Let your thigh lead, then whip the lower leg through.”
The leg should feel fast rather than forced.
Step 4: Lock the ankle
This is one of the smallest-looking details with one of the biggest effects on the strike.
For a powerful laces shot, the ankle should be firm, with the toes pointing down rather than loose and floppy. Biomechanical research describes powerful instep kicking as involving a tightly plantarflexed foot and ankle at impact, while experimental work has shown that restricting ankle plantar flexion can reduce ball velocity.
Imagine the foot becoming part of the end of the leg rather than behaving like a separate, soft object.
A young player who swings quickly with a loose ankle can produce plenty of movement and surprisingly little ball speed. The foot absorbs part of the interaction instead of presenting a firm surface to the ball.
This is why shooting technique soccer laces work depends on more than simply knowing where the laces are.
Step 5: Strike through the centre of the ball
Now comes the part everyone notices, although it is only one moment in a much longer movement.
Bring the laces through the middle of the ball with the ankle firm and the knee extending rapidly.
For a driven shot, contacting around the centre helps keep the ball travelling forward rather than producing unnecessary lift. Contact lower on the ball generally increases launch height, which is useful when a player deliberately wants to lift or chip the ball.
The foot-ball collision itself happens extremely quickly, and research using high-speed cameras has shown that the interaction lasts only around 9 milliseconds in maximal instep kicking.
There is no time for a player to make a correction after contact.
That is why the movements before contact matter so much.
Step 6: Keep the chest over the ball
Young players often hear “keep your head down” when shooting, although the more useful coaching idea is to keep the body appropriately positioned over the ball.
A player leaning backwards at impact creates a natural tendency for the strike to travel upward, particularly when the foot contacts underneath the ball.
A slight forward body position helps the player drive through the ball and maintain a lower trajectory. Youth coaching guidance from Special Olympics similarly emphasises keeping the head and body over the ball, planting the support foot beside it and following through toward the target.
This does not mean folding the chest dramatically over the ball.
The player should remain athletic, balanced and capable of continuing the movement after contact.
Step 7: Follow through instead of stopping at the ball
The follow-through is where many beginners reveal what happened during the strike.
A full follow-through allows the kicking leg to continue travelling after contact, rather than abruptly stopping the movement immediately after the ball leaves the foot.
The player should finish moving toward the intended target and naturally transfer weight forward onto the kicking foot.
This does not mean the follow-through magically creates power after contact. The ball has already received its main impulse. Instead, the follow-through is part of the movement pattern that allows the player to accelerate smoothly through the ball rather than decelerating before impact.
Research on instep kicking supports the broader principle that the coordination and speed of the body segments leading into impact are central to producing high ball velocity.
READ ALSO | How to Make a College Soccer Highlight Video That Coaches Will Actually Watch
Power And Accuracy Are Different Skills
This is where young players can become confused.
A player who can hit a ball at maximum speed cannot automatically place that ball accurately. Research examining thousands of soccer kicks found that kicking error increased as kicking speed increased, while side-foot kicks were generally more accurate than instep kicks.
That trade-off explains why a 100-percent swing is rarely the answer.
A useful progression for children is:
First, clean contact.
Then, accuracy.
Then, add speed.
Once a player can consistently strike the ball cleanly toward a target at moderate intensity, increasing the speed of the movement becomes much easier.
England Football makes a similar distinction between finishing techniques, noting that laces provide power while the side-foot technique offers greater accuracy.
Simple Youth Drill For Building Power
Place the ball about 8 to 12 metres from goal and create a small target inside the goal rather than simply telling the player to “hit it hard.”
Start with a two-step approach.
- Approach slightly from the side.
- Plant the non-kicking foot beside the ball.
- Point the plant foot toward the target.
- Keep the ankle firm and toes down.
- Strike the centre of the ball with the laces.
- Keep the chest over the ball.
- Follow through toward the target.
- Repeat at roughly 70 to 80 percent effort before increasing power.
Give the player one technical instruction at a time rather than firing six corrections at them after every attempt.
A useful first session might focus only on the plant foot. The next can emphasise the ankle and contact point, followed by sessions that gradually introduce a faster approach and more realistic finishing situations.
The same gradual approach can be applied when developing a weaker foot, starting with controlled repetitions before progressing towards faster and more demanding actions.
Three Common Reasons A Young Player’s Shot Lacks Power
1. The plant foot is wrong
If the support foot is too far away, too far behind or poorly aligned, the player loses balance and makes clean contact harder.
2. The ankle is loose
A fast swing with a floppy foot can feel powerful while producing a relatively soft strike.
3. The player tries to muscle the ball
Power comes from the coordinated sequence of pelvis, thigh, knee, lower leg and foot, rather than one violent swing of the lower leg.
Strength matters as players grow, yet research in younger footballers also shows that ball velocity develops alongside age, leg strength, neuromuscular activation and changes in kicking mechanics.
That means parents should resist comparing a 12-year-old’s shot with the thunderbolt of a physically mature teenager.
Technique comes first.
READ ALSO | How to Write an Email to a College Soccer Coach With (Copy-Paste Templates)
Easiest Way To Remember The Whole Movement
For a young player, reduce the biomechanics to one sequence:
Approach → plant → load → lock → strike → follow through.
The approach creates rhythm, the plant foot gives the body a stable platform, the backswing prepares the kicking leg, the locked ankle creates a firm striking surface, the knee and lower leg accelerate through the ball, and the follow-through keeps the movement flowing toward the target.
The hardest shot is rarely the one where the player tries hardest.
It is usually the one where everything arrives at the ball at the right moment.
And that is the useful lesson behind learning how to shoot a soccer ball with power: the ball does not care how hard a young player thinks they are kicking. It responds to what the body actually does.